Inward Lock 2.0 Installation Guide
Installs in minutes with a power drill, a 1/8″ drill bit and a Phillips bit. The full illustrated guide is in the PDF below.
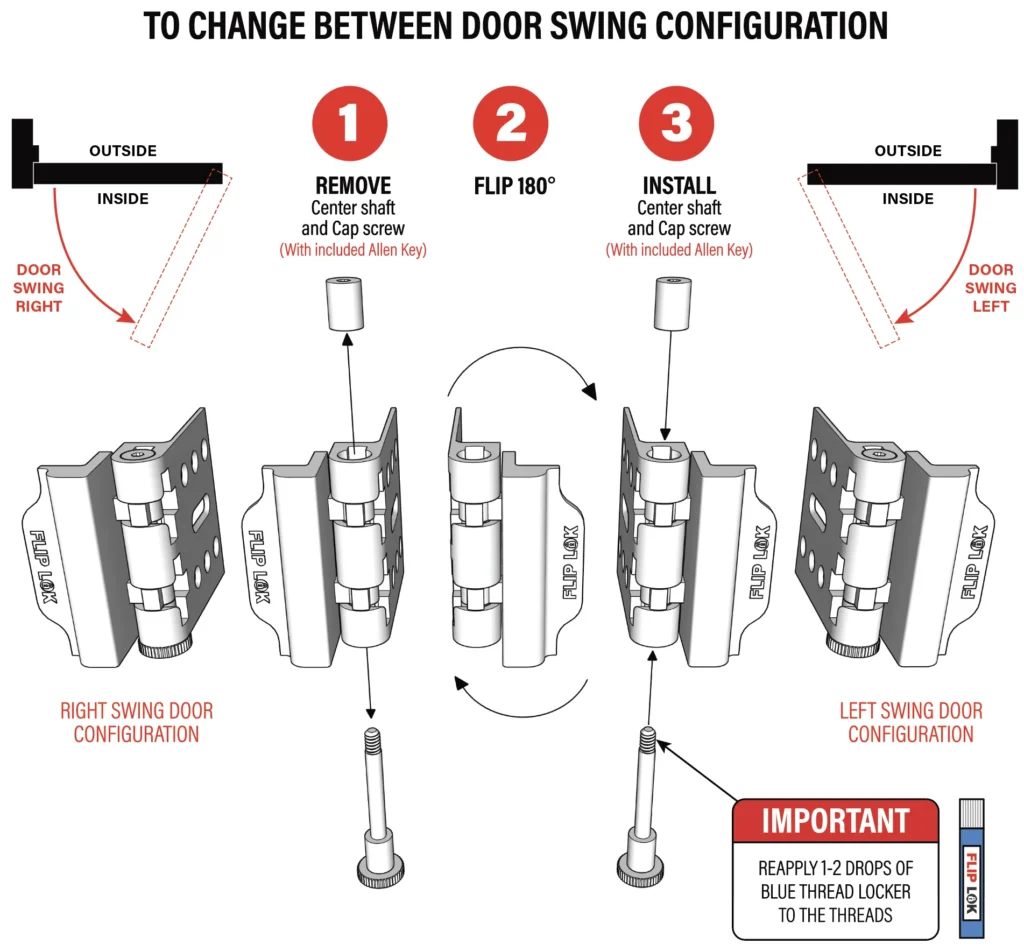
- Check your swing direction. Standing inside, see whether the door opens to the left or right, and set the lock to match (flip it around and move the spacer so the word “TOP” faces up).
- Position the lock. With the door closed, slide FlipLok between the door and the frame, leaving a little space so it won’t scratch the door.
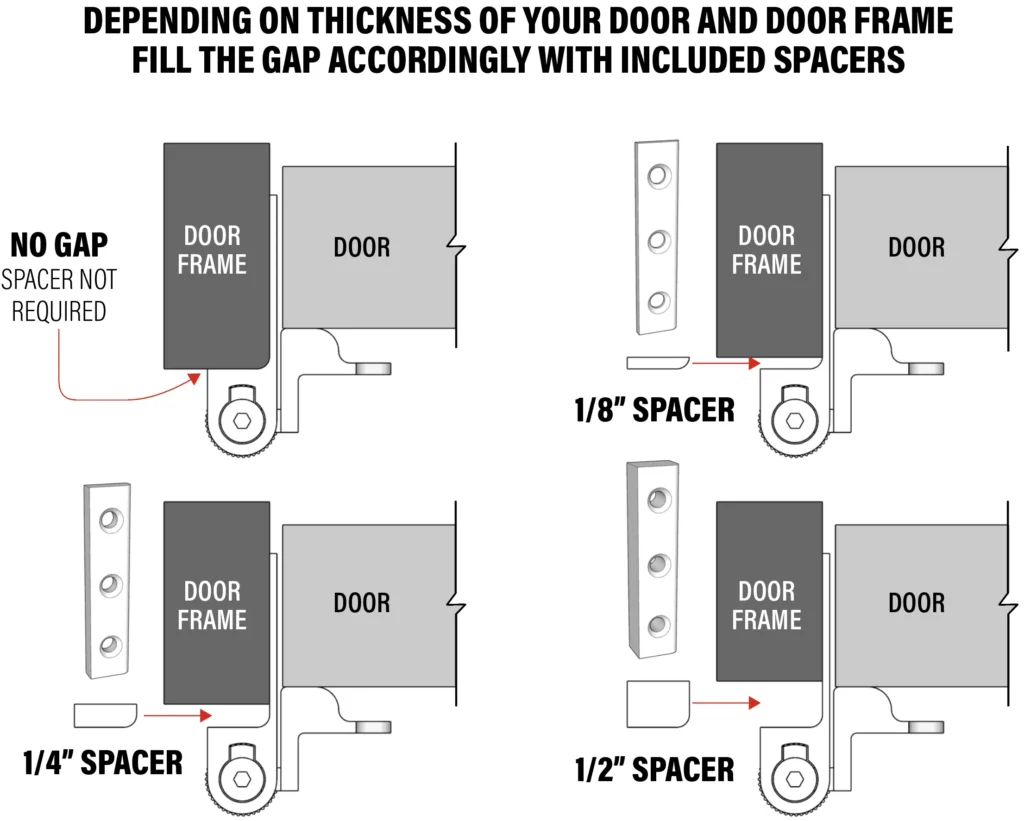
- Pick the right spacer. Test the 1/8″, 3/8″ and 5/8″ spacers and use the one that fills the gap between the lock and the door frame.
- Mark and pre-drill. With the door open and the lock in the unlocked position, mark the six mounting holes and pre-drill with a 1/8″ bit.
- Install the six Phillips screws. That’s it.
Important: using the wrong-sized spacer significantly weakens the lock. Make sure the spacer fills the gap completely.
Outward Lock 2.0 Installation Guide
For doors that swing outward. You’ll need a power drill, a 1/8″ drill bit, a Phillips bit and a 13mm wrench (a center punch is optional). The full illustrated guide is in the PDF below.
- Set the swing direction. Standing inside, check whether the door opens to the left or right, then move the door-swing tab and flip the lock to match.
- Plan the frame plate. Decide where the frame plate will sit on your door frame or door stop; that determines which of the three slots the M8 bolt goes in. The lock sits 3/4″ from the frame plate.
- Choose your height. High above the knob for childproofing, just above the knob for everyday use, or below the knob for wheelchair access.
- Mount the lock on the door. Drill the screw holes with a 1/8″ bit to a depth of 1″ only (do not drill through the door), install the five 1″ screws, then slide on the screw cover plate.
- Mount the frame plate. Center-mark the bolt hole on the frame, line up the frame plate’s crosshair, pre-drill, and install the four 3″ screws.
- Set the bolt. Hand-tighten the M8 bolt and nut, center it in the locking notch, then fully tighten with a 13mm wrench.
Note: the included screws are designed for solid wood doors. Hollow-core doors aren’t recommended, and metal doors need rivets or jack nuts.

Original (1.0) Lock Instructions
Have an original FlipLok? Open the guide for your lock below.
Inward Lock 1.0 (Original)
Video, written instructions, swing direction and spacers
Outward Lock 1.0 (Original)
Video and written instructions
IMPORTANT NOTE:
The Blue vial included in the packaging is thread locker indended only for the head bolt in the central shaft.